
In our last Post , we have understand the fundamental concepts around WebSpeed and how it’s various components work together to process the client request . If you have not read it , I would request you to first read the previous post here – OpenEdge: WebSpeed Theory Simplified.
This post would guide you through building a simple browser based web application using OpenEdge Webspeed .
What We’re Going To Build ?
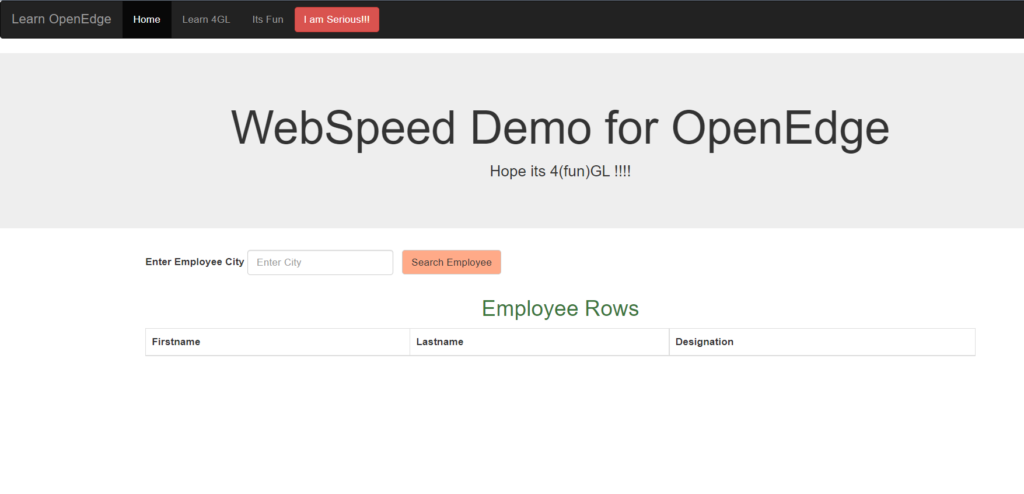
The webpage we’re going to build in this post looks like the following(Sample Webpage of our Application):
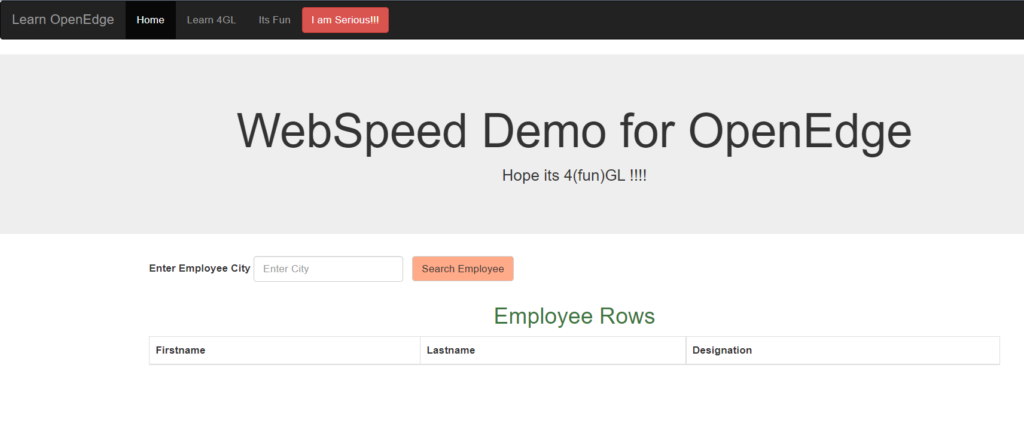
Above is a simple browser based webapp that would help any user in getting the Employees of a particular city .
User-Interface
We have split the user interface into two sections.
On top – a input text box is visible Enter Employee City which would allow user to enter city name against which he/she wants to get the data of an Employee.
Next section is a HTML table that would list down all the Employee who live in the city entered . (We are only fetching First Name , Last Name and Designation of Employee for our purpose. )
Setting Up The Project
The project setup is really simple.
Prerequisite –
- Progress OpenEdge Installed in the system locally (ver 11.7) .
- Configured WebSpeed locally Using Tomcat as a WebServer ( Don’t Worry !!! I have explained it here)
- Database – sports2000 available from Progress (If you want to understand as how can we use sports 2000 – Read this )
- Notepad++ for editing the source files .
- Pain of Discipline .
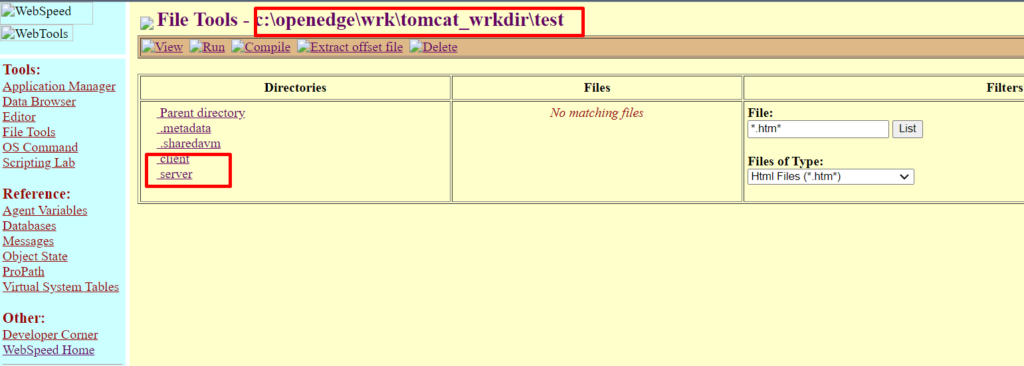
Set up Folder Structure –
We would set up the folder structure –
C:\OpenEdge\WRK\tomcat_wrkdir\test
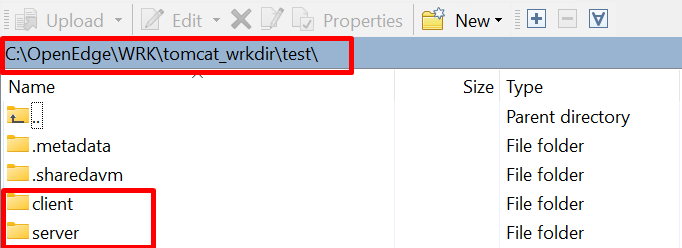
Above two subfolders client & server would contain respective codes for client and server .
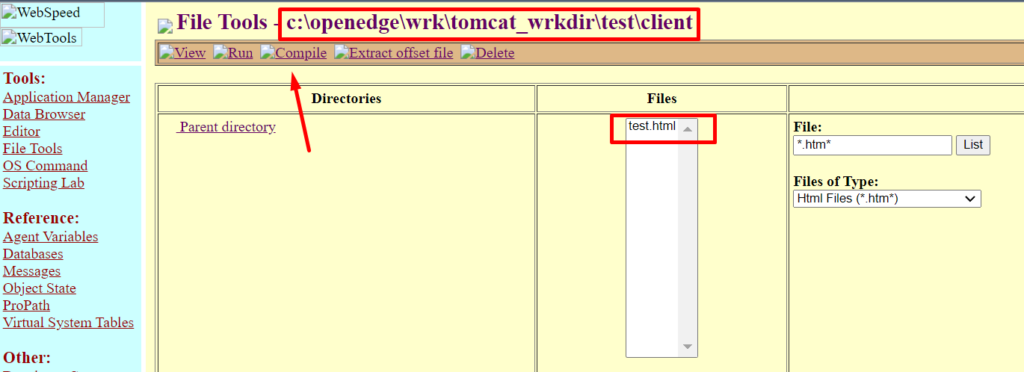
Entry Point for our Application
The file test.html is the entry point for our application and is an HTML source for UI .
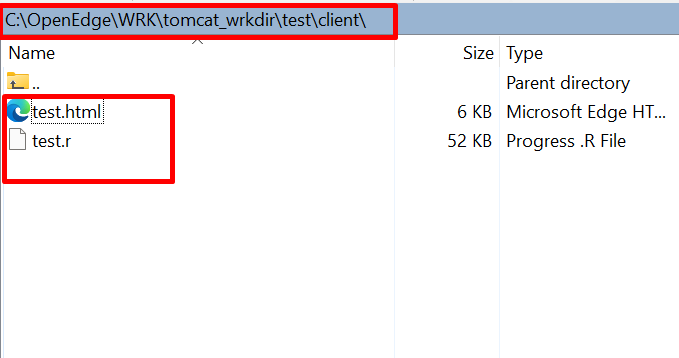
We’re starting by creating a basic HTML structure in test.html as you can see in the following listing:
<!DOCTYPE html>
<html lang="en">

<head>
  <title>WebSpeed Example</title>
  <meta charset="utf-8">
  <meta name="viewport" content="width=device-width, initial-scale=1">

  <link rel="stylesheet" href="https://maxcdn.bootstrapcdn.com/bootstrap/3.4.1/css/bootstrap.min.css">
  <script src="https://maxcdn.bootstrapcdn.com/bootstrap/3.4.1/js/bootstrap.min.js"></script>

  <!-- Include jQuery and other required      files for Bootstrap -->
  <script src="https://code.jquery.com/jquery-3.3.1.min.js">    </script>
  <script src="https://unpkg.com/bootstrap-table@1.16.0/dist/bootstrap-table.min.js">    </script>

</head>
Including jQuery, Bootstrap
We’ll use Bootstrap classes for applying styling to the user interface components. The easiest way to include Bootstrap is to add it from CDN.
First add the following in the head section:
<link rel="stylesheet" href="https://maxcdn.bootstrapcdn.com/bootstrap/3.4.1/css/bootstrap.min.css">
<script src="https://maxcdn.bootstrapcdn.com/bootstrap/3.4.1/js/bootstrap.min.js"></script>
Html Body –
All we have in our body is the way to structure the table layout using Bootstrap Classes . Also , I tried to customize navbar and user form input as well here .
<body>
<nav class="navbar navbar-inverse">
<div class="container-fluid">
<div class="navbar-header">
<a class="navbar-brand" href="#">Learn OpenEdge</a>
</div>
<ul class="nav navbar-nav">
<li class="active"><a href="#">Home</a></li>
<li><a href="#">Learn 4GL</a></li>
<li><a href="#">Its Fun</a></li>
</ul>
<button class="btn btn-danger navbar-btn">I am Serious!!!</button>
</div>
</nav>
<div class="jumbotron text-center">
<h1>WebSpeed Demo for OpenEdge</h1>
<p id = 'date'>Hope its 4(fun)GL !!!!</p>
</div>
<div class="container">
<form class="form-inline">
<div class="form-group">
<label for="city">Enter Employee City</label>
<input type="text" class="form-control" id="city" placeholder="Enter City" />
<button class="btn-demo btn-default" id='mybutton'>Search Employee</button>
<p data-field="date"></p>
</div>
</form>
</div>
<div class="container">
<h2 class="text text-success text-center ">Employee Rows</h2>
<span class="loading-wrap">
<span class="loading-text"></span>
</span>
<table id="example" class="table table-bordered table-striped border-success" >
<thead>
<tr>
<th data-field="date">Firstname</th>
<th data-field="time">Lastname</th>
<th data-field="email">Designation</th>
</tr>
</thead>
</table>
</div>
</body>Implementing the JavaScript –
We would do below things in JavaScript
- Take User Input into JavaScript Object (and convert the Js object into Json String)
- Make an AJAX Call
- Fill up our Bootstrap Table with the returned JSON response .
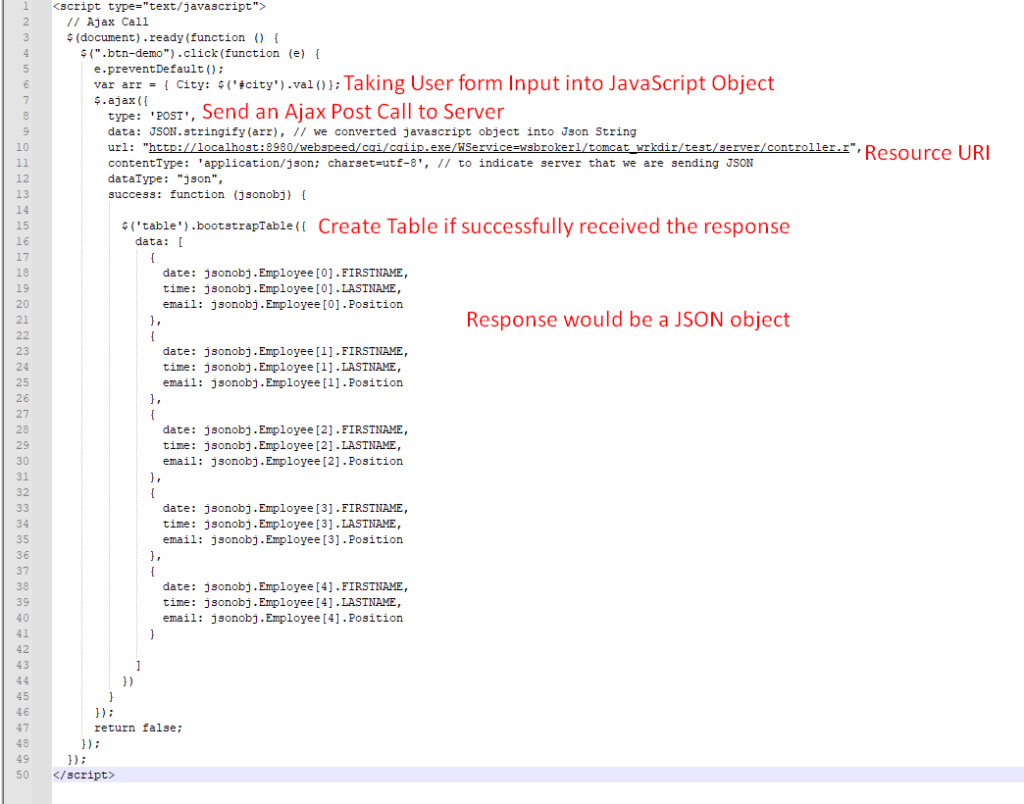
It is important to understand that we here have not gone much into rewriting the URL (Resource URI) . I will cover the same in a separate Post .
Understand the AJAX URL
All the components of our URL are described below .

We have finished up with our Client side implementation –
- HTML file for UI
- jQuery and Bootstrap for quick UI template
- JavaScript to invoke a server call for data
Setting up the Server Resources
Server Configuration would include –
- Employee Class – An implementation of Employee Class that would allow for data access and sending back the requested data (Employee List of a city ).
- Controller Program – that shall act as as an interface between client request and data access.
- WebSpeed Workshop – To compile the Source Code (HTML , .cls & .p). Also to manage quickly the database records and its connection .
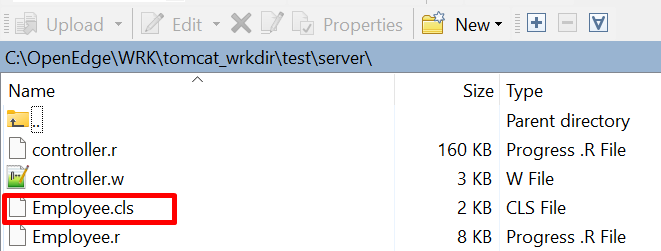
Employee Class –
An Employee Class would be created in Employee.cls in below folder structure –
/*------------------------------------------------------------------------
    File        : Employee
    Purpose     :
    Syntax      :
    Description :
    Author(s)   : BlogEdge
    Created     :
    Notes       :
  ----------------------------------------------------------------------*/


USING Progress.Lang.*.
USING Progress.Json.ObjectModel.*.

BLOCK-LEVEL ON ERROR UNDO, THROW.

CLASS Employee:

  DEFINE VARIABLE oEmployeeList AS JsonObject NO-UNDO.

  CONSTRUCTOR PUBLIC Employee (  ):
    SUPER ().

  END CONSTRUCTOR.

  METHOD PUBLIC VOID SearchEmployee(INPUT  myJsonObj     AS JsonObject,
                                  OUTPUT oEmployeeList AS JsonObject):

    DEFINE VARIABLE oRec          AS JsonObject NO-UNDO. // object
    DEFINE VARIABLE oArray        AS JsonArray  NO-UNDO. // array

    oArray        = NEW JsonArray().
    oEmployeeList = NEW JsonObject().

    FOR EACH Employee
        WHERE Employee.City EQ STRING(myJsonObj:GetJsonText("City")) //client input
        NO-LOCK :

        oRec   = NEW JsonObject(). // lets create a json object for storing employees

        oRec:ADD("FIRSTNAME", Employee.FirstName).
        oRec:ADD("LASTNAME", Employee.LastName).
        oRec:ADD("Position", Employee.Position).


        oArray:ADD(oRec). /* Add EACH json object in your Array*/

    END.

    oEmployeeList:Add("Employee",oArray). //once your array is completed add it to jsonobj

    RETURN .

    CATCH e AS Progress.Lang.Error:

    END CATCH.

  END METHOD.

END CLASS.
Controller Program –
Controller Program shall act as an interface between client request
and server for data access services.
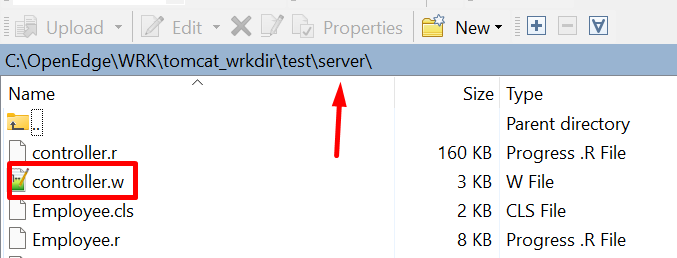
controller.w shall be put in server folder as well – .
Implementing Controller-
Controller program would create an instance of Employee Class and invoke class’s method to get the Employee data.
/*--------------------------------------------------------------------------
    Library     :
    Purpose     : Controller Program to act as an interface between client ajax request
                  and data access services
  ------------------------------------------------------------------------*/
USING PROGRESS.IO.OutputStream FROM PROPATH.
USING Progress.Json.ObjectModel.*.
USING Progress.Json.JsonParser.

{C:\Progress\OpenEdge\src\web2\wrap-cgi.i} /* web-objects USE certain PROGRESS constructs that are DEFINED IN the file  */

RUN ProcessWebRequest.

PROCEDURE ProcessWebRequest:
    RUN SearchEmployee .
    RETURN.
END PROCEDURE.

PROCEDURE SearchEmployee:
/*------------------------------------------------------------------------------
  Summary    :
  Parameters : <none>
  Returns    :
  Remarks    :
------------------------------------------------------------------------------*/
DEFINE VARIABLE myJsonObj           AS JsonObject                                   NO-UNDO.
DEFINE VARIABLE myParser            AS ObjectModelParser                            NO-UNDO.
DEFINE VARIABLE myLongchar          AS LONGCHAR                                     NO-UNDO.
DEFINE VARIABLE myEmployee          AS Employee                                     NO-UNDO.
DEFINE VARIABLE chrname             AS CHARACTER                                    NO-UNDO.
DEFINE VARIABLE myEmpJsonobj        AS JsonObject                                   NO-UNDO.


myParser  = NEW ObjectModelParser( ). // FOR parsing INPUT JSON
myJsonObj = NEW JsonObject( ).       // FOR STORING INPUT json

myJsonObj   = CAST((myParser:Parse(STRING(WEB-CONTEXT:FORM-INPUT))), Progress.Json.ObjectModel.JsonObject).

myEmployee = NEW Employee().

myEmployee:SearchEmployee(INPUT myJsonObj,
                          OUTPUT myEmpJsonobj).

myEmpJsonobj:WriteFile("C:\OpenEdge\WRK\tomcat_wrkdir\test\server\myEmpJsonobj.json", TRUE).

output-content-type ("application/json":U).

myEmpJsonobj:WriteStream('WebStream').
END PROCEDURE.
Above Controller program is performing below functions –
- Creating an instance of an Employee Class
- Invoking Search Employee method of Employee Class and getting the employee data as a JSON object .
- We are writing the response optionally in a text file for testing purpose . Data returned will be of JSON type .
- Outputting the server data back to Client using WriteStream .
- Content Type is set as JSON for HTTP headers .
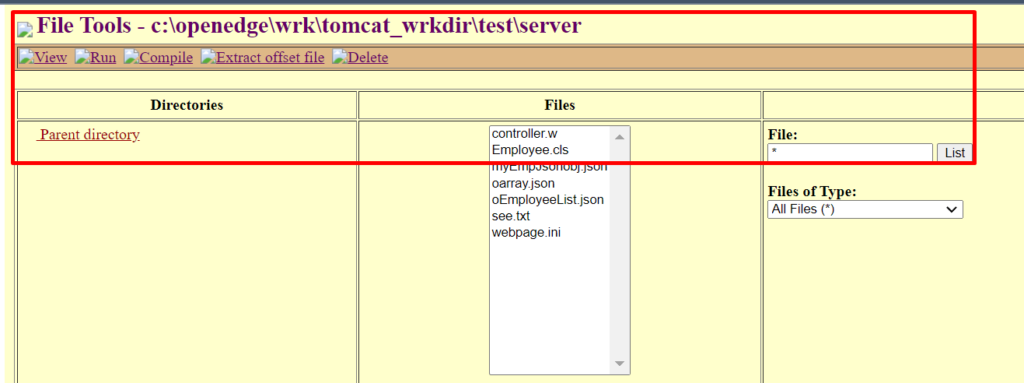
Compiling the Source codes –
We are using WebSpeed WorkShop tool for compiling our files in a quick go . See below –
- Open WEbSpeed Workshop Tool
- Navigate to Folder
- Compile
WebSpeed Workshop –
Compile our HTML – test,html
As we click on compile – we would generate our .r (WebObject) .
Webspeed Agent require WebObject to be available for it to run and process .

Compile Server Programs – controller.w & Employee.cls
Once we compile all the files , lets start our application by typing its URL (you can also execute the same using Run command from webspeed workshop).
Anyways our Application’s URL would be – http://localhost:8980/webspeed/cgi/cgiip.exe/WService=wsbroker1/tomcat_wrkdir/test/client/test.html
Understand the URL

Lets now use the Application –
Enter the City Name –
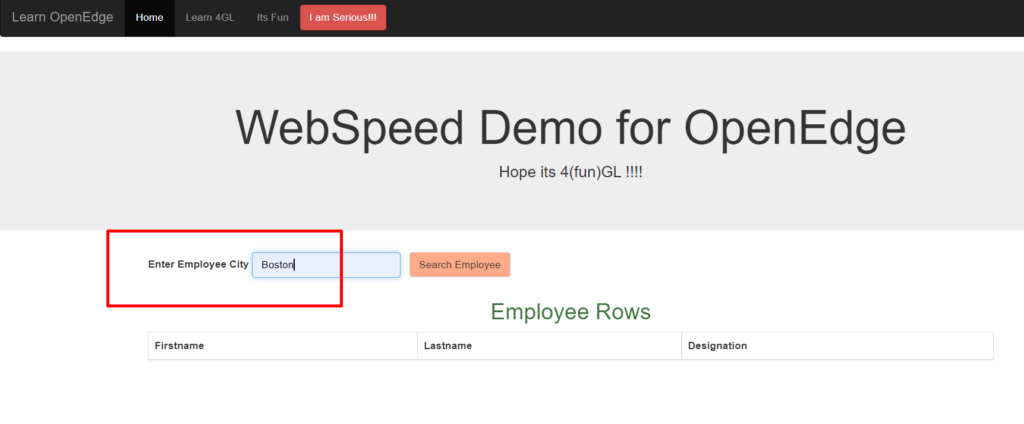
I have entered the City as Boston –
Before we move to see the results – lets also verify the if the HTTP request is invoked as intended .
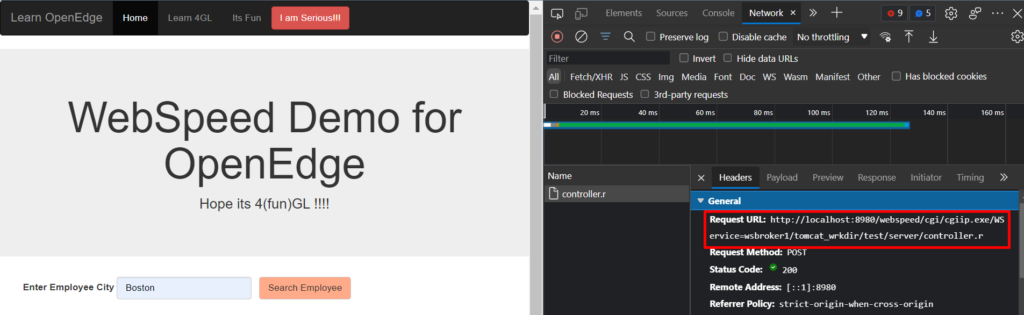
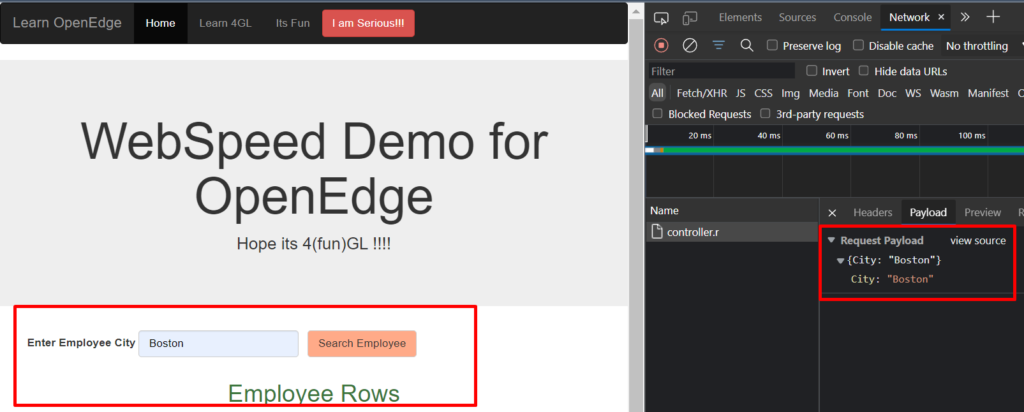
Now Lets Click Search Employee and see the results –
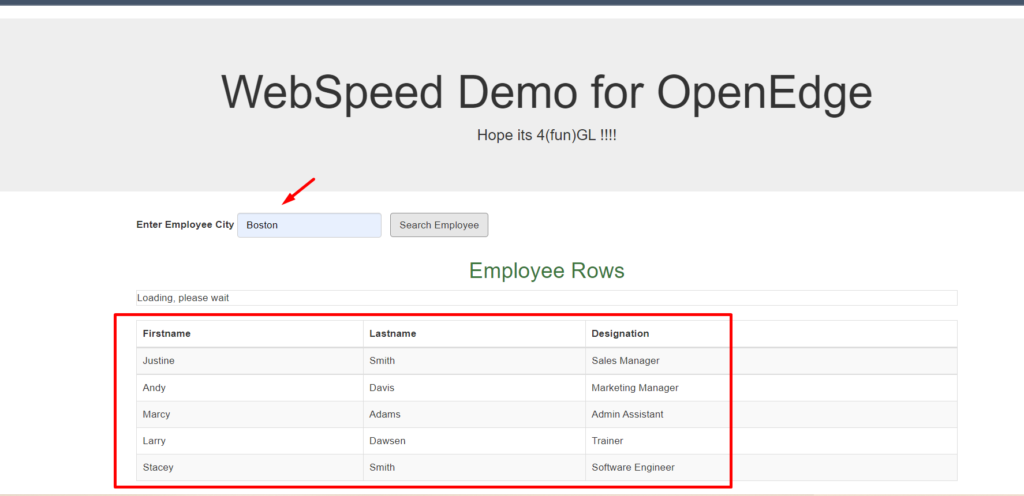
Voila !!!! – We got our data or response from the server . This looks really well and seems like we have came far from learning theories . 😉
Note- We got the above result for city Boston .
Also Did you Remember that we were optionally writing the response into a text file for our testing purpose in controller.w ?

Lets Verify the same as below-

So far All looks promising , but can we ever rest ourselves unless we validate it against the database . Lets use simple 4 GL query and see the results –
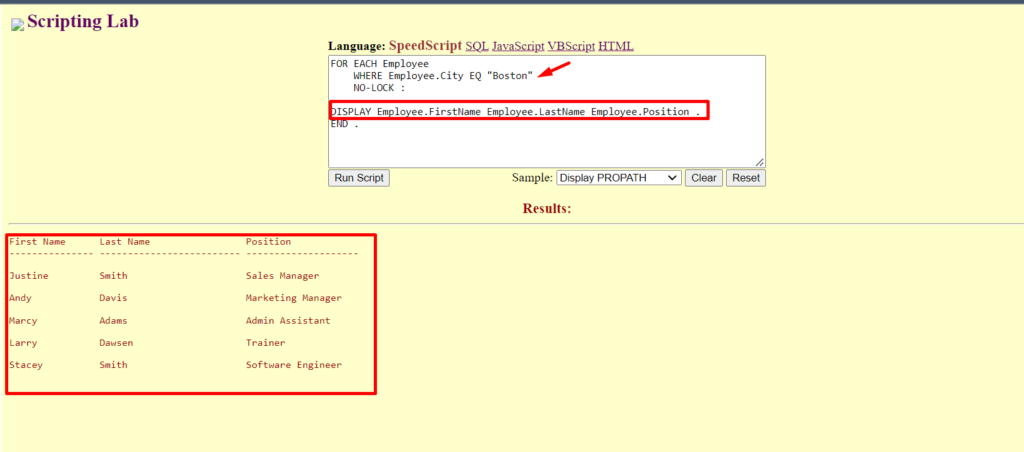
ThankGod – We are good . 🙂
Summary of What Actually Happened Above?
I believe we can summarized above in following points –
- Learnt & understand step-by-step as how can we build an application using Webspeed framework & can deploy/run our App using WebBrowser .
- How various components interact from an HTML source to our Progress programs for accessing the data as requested
- Learnt the finer details such as compilation , class implementation using 4Gl and outputting the server response to WebBrowser .
- Understanding JSON as a medium of transferring the data across the systems .
Hopefully you have gained a better understanding of WebSpeed after reading above post, and I hope you have enjoyed it as well.
You are welcome to share this with others in your community, and also feel free to add your valuable comments here.